ArcGIS Pro
1. Add to the Map the watershed shapefile.
2. Create an internal buffer of your shapefile (remember that the buffer distance must be negative, for example: -1000). Follow this tutorial.
3. Add the SSURGO Bulk Downloader.tbx tool to the ArcGIS Toolboxes in the Project Catalog. Follow this tutorial.
4. Use the SSURGO Bulk Dowloader. Follow this tutorial.
At this point, you should have a layer representing your watershed (with the internal buffer), created by merging the county layers and clipping them to the boundary of your watershed.
5. If your layer is not already projected in a projected coordinate system, use the Project tool. Follow this tutorial.
6.In the attribute table of the newly created layer, create the following new fields: Name, HSG_Orig, HSG, Texture, HSG_Num, Init_Cont, Sat_Cont, Suction, Conduct. Follow this tutorial.
7. Use the Join Table tool to add soil data fields (e.g., HSG) to the watershed layer by joining with the text files contained in the geodatabase. Follow this tutorial.
8. At this point, you’ve populated the Name and HSG_Orig fields. Some cells in HSG_Orig have a value of 0 because the original field (Hydrologic Group) was missing data for those entries. To assign a value other than zero, you'll need to use an Excel table. So now, copy the entire attribute table as populated up to this point and paste it into an Excel spreadsheet.
Excel Spreadsheet
1. Select all the attribute table (ctrl + a) and copy it (Copy button on top of the attribute table), then paste it in a new sheet of this excel spreadsheet.
The purpose of this Excel file is to allow the user to populate the remaining fields in the attribute table of our polygon layer.
1. However, the first step is to fill in all the missing values (currently set to 0) in the Texture field. To do this, you need to refer to the Name field—this is exactly why it was created. The Name field provides a detailed description of the soil type for each polygon in the layer, which can then be used to infer and assign the correct Texture values. Follow this tutorial.
2. To fill the values of the HSG column that are currently 0 you use the Lookup Table in the second sheet of the excel file with a formula containing the VLOOKUP function.
3. Note: you may have some errors while computing the Initial Content, for example, if in the Texture column there are some cells with words that are not contained in the Lookup Table. In this case you have to modify the text in those cells with something appropriate (Use the find and replace function).
In the image below, for example, the values contained in the Texture column (first column) are not contained in the Lookup Table (second picture). Loamy coarse sand and Loamy fine sand are not present in the Lookup Table.


4. Compute the rest of the fields using the VLOOK function.
5. The only remaining field to populate is HSG_Num. You populate it looking at the HSG field. Every letter of the HSG field correspond to a number in the HSG_Num field.
The table below shows you how to populate the HSG_Num field.
Notice that with HSG value with two letters (A/B, B/D, etc..) in a conversative way we choose the number of the higher letter.
| HSG | HSG_Num |
|---|---|
| A | 1 |
| B | 2 |
| C | 3 |
| D | 4 |
| A/B | 2 |
| A/C | 3 |
| B/C | 3 |
| A/D | 4 |
| B/D | 4 |
| C/D | 4 |
You will have to import those fields in the attribute table of your polygon layer in ArcGIS, and you're going to use the Add Join tool.
ArcGIS Pro
1. Add Join > Select the excel file > Select the spreadsheet > Select the field that you have to match (for example FID).
2. Right-click on your empty field > Calculate Field > import the values from the field imported from excel.
3. Remove all joins.
Now in the attribute table you have the original field populated with all the values.

4. You now need to import the NLCD 2024 dataset you downloaded earlier.
Note: Change the colors of the NLCD 2024 raster display by going to the Symbology options and selecting Color Map.


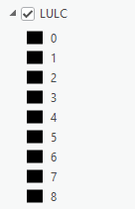
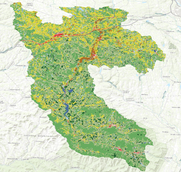
5. Clip the NLCD 2024 using the buffered watershed perimeter with the Clip Raster tool. From now on, we will refer to the output of this raster clip as simply LULC raster. Follow this tutorial. Let's call it LULC (Land Use Land Cover).
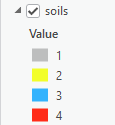
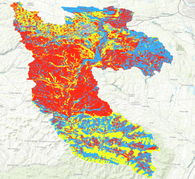
6. Polygon to Raster -> with your Basin_Buffer_Project layer To create a raster with only the HSG number (1, 2, 3, 4). Let's call it Soils. Follow this tutorial.
7. Polygon to Raster for every field in the polygon layer of your watershed to extract a raster for every loss parameter needed for the green amp method (Init_Cont, Sat_Cont, Suction, Conduct).
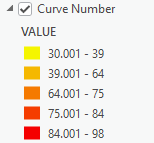
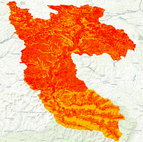
8. Raster Calculator to obtain the Curve Number Raster You have to use the following code, where Soils and LULC are the names of the raster generated previously.
You can also download it here:
HOW TO GET THE IMPERVIOUS RASTER
Now we need to obtain a raster containing the impervious percentage value. To do this:
A) We convert the Land Cover raster (the previously obtained LULC raster, see point 5, clipped to the watershed) into a shapefile. By doing so, we will get a gridcode value in the attribute table.
B) Using an Excel file, we will associate a specific impervious value to each gridcode.
C) Using the “Add Join” tool, we will link the Impervious field from the Excel sheet to the shapefile.
D) We extract the raster with impervious values using the “Polygon to Raster” tool.
Step A) You need to use the Raster to Polygon tool to convert the Land Cover raster into a shapefile. This tool converts a raster dataset into vector polygons, where each polygon represents a group of contiguous cells with the same value. Follow this tutorial.
At this point, by opening the attribute table, you’ll see that it looks like the one shown in the figure—specifically, it includes a field called gridcode.

Excel Spreadsheet
Step B) We have to use an excel file that contains a Lookup Table that helps connect every value of the gridcode field to a specific impervious value. So, we have to select all the attribute table (ctr+a), copy it (Copy button on top of the attribute table), then paste it in a new sheet of this excel spreadsheet:
Once you have generated the Impervious column in the Excel file, save and close the file.
ArcGIS Pro
Step C) Use the Add Join command to add the Impervious column to the attribute table of the Basin_LULC shapefile.
Then, you must always create a new Impervious field and use the Calculate Field tool to populate this field with the values from the Impervious field imported through the Add Join. Afterwards, right-click the layer in the Table of Contents, then select Joins and Relates > Remove All Joins.
Aggiungi commento
Commenti