This tutorial in part of the following workflow: Loss Parameters Calculation.
You need to have the gSSURGO_NY.gdb linked to your database folder. It contains the text files that you will need for the Join Field operations.

The goal is to populate these newly created fields by extracting information from text files, which, in this example, are contained within a geodatabase.
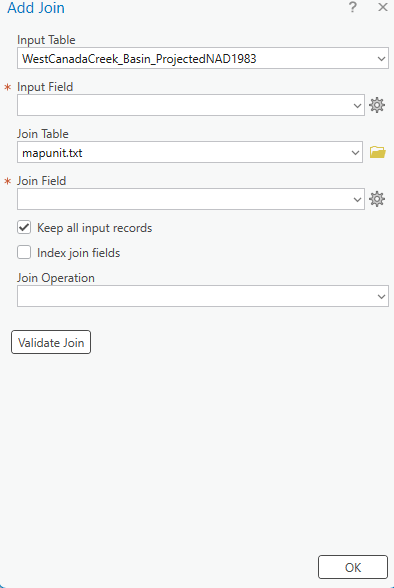
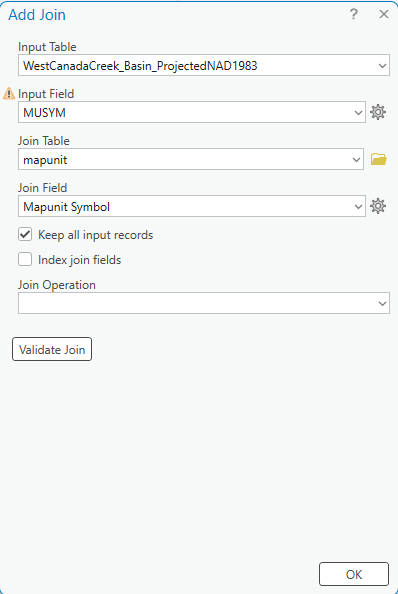
Open the Add Join tool
-
Right-click your layer in the Contents pane.
-
Hover over Joins and Relates.
-
Click Add Join... from the submenu.
-
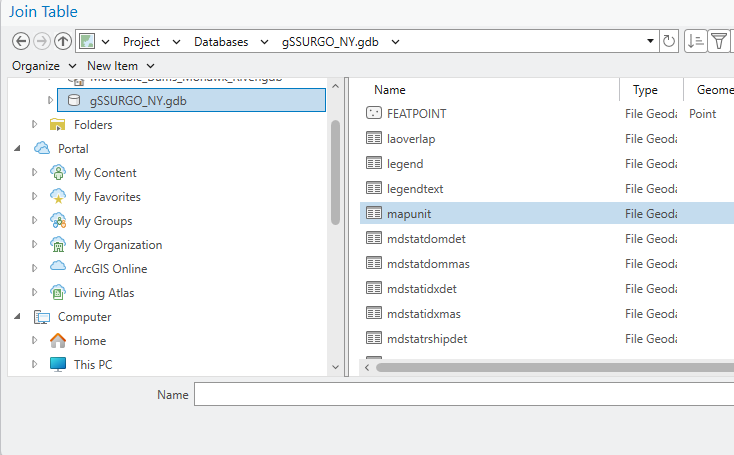
Choose the table and matching fields, then click OK. (Select them from the gSSURGO_NY geodatabase)

Populate Name field.
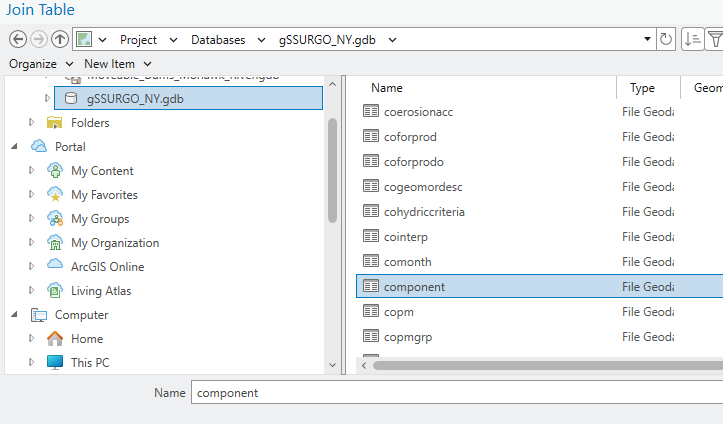
Join Table: geodatabase > mapunit
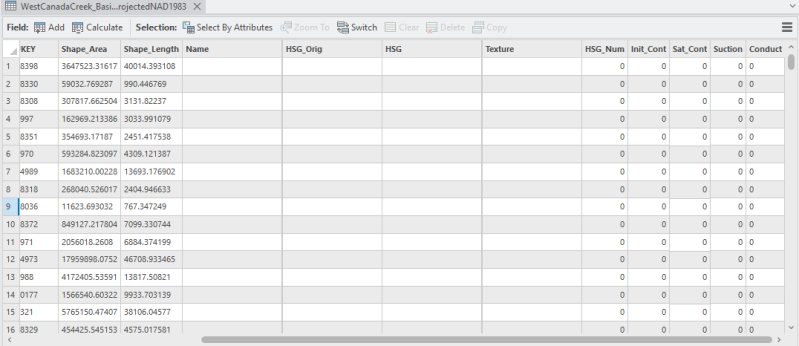
Now it populated the attribute table with new more fields:
In this way, we populate the Name field (which we previously created) with the values from the Mapunit Name field.


Now that we’ve populated the Name column with the information we needed, we can remove the joined fields using the Remove Joins command.

In this way, you obtain the attribute table with the original fields, but this time the Name field has been populated.

Populate HSG_Orig
As before, use the Add Join tool.
As Input Field we select: MUKEY.
As Join Table we select the component file in the geodatabase.
As Join Field it will automatically select Mapunit Key. Let's keep this.

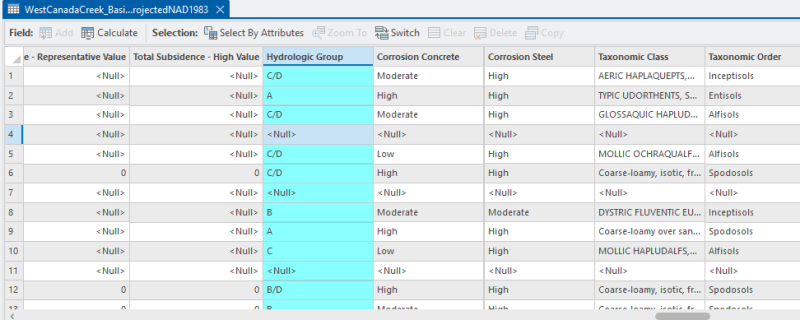
As a result, we'll once again have an attribute table populated with numerous fields, which we’ll eventually remove. The field we’re interested in is Hydrologic Group.
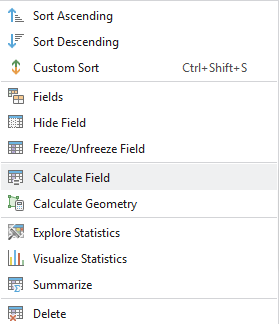
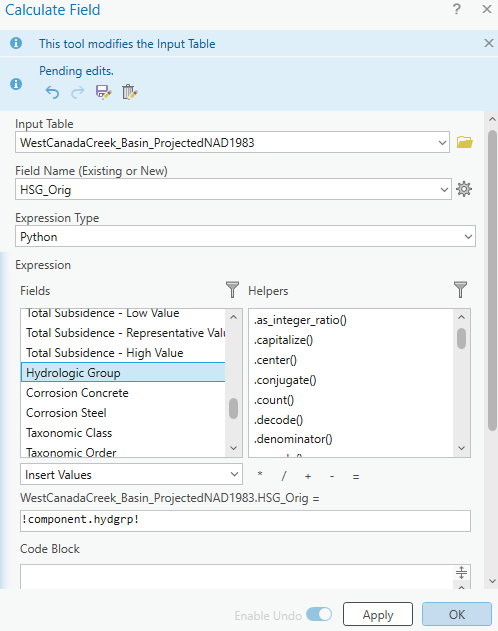
As done previously, select the field we need to populate—in this case, HSG_Orig—right-click it, and choose Calculate Field.
In the Calculate Field window, select the Hydrologic Group field and click OK.
Here’s how to proceed:
-
Click “Save” to commit the field calculation in the attribute table.
-
Right‑click the layer in the Contents pane → Joins and Relates → Remove All Joins.
This removes all temporary joins, restoring the original attribute table but preserving the updated HSG_Orig field populated with values from Hydrologic Group.

Populate Texture Field
To retrieve the Texture field value for each feature in your layer, you need to perform a series of intermediate joins using key fields that logically connect multiple tables within the geodatabase.
The target information — the Texture field — is stored in the chtexture table. However, in order to associate this field with your working layer, you must go through several intermediate tables using their respective key identifiers. Below is the sequence of required joins:
-
Join your layer with the component table using the mapunitkey field.
➤ This provides access to the componentkey field. -
Join your layer (now containing componentkey) with the chorizon table, using componentkey as the join field.
➤ This allows you to obtain the chorizonkey field. -
Join with the chtexturegroup table, using chorizonkey.
➤ This yields the chtexturegroupkey field. -
Finally, join with the chtexture table, using chtexturegroupkey.
➤ At this point, you can retrieve the desired Texture field.
During each join, it's essential to ensure that the fields used for matching are of the same data type (e.g., both numeric or both text). If the data types differ, ArcGIS will not match records properly, resulting in zero joins.
In other words, using the Add Join → Calculate Field → Remove All Joins workflow in sequence, you should proceed in the following order:
-
Your Layer → component
→ Populate the ComponentKey field. -
Your Layer → chorizon
→ Populate the ChorizonKey field. -
Your Layer → chtexturegroup
→ Populate the ChTextureGroupKey field. -
Your Layer → chtexture
→ Finally, populate the Texture Original field (Text_Orig).
This is also explained in this tutorial: Formatting gSSURGO Data for Use within HEC-HMS
In the image below you can see the last Calculate Field operation to populate the Texture field.

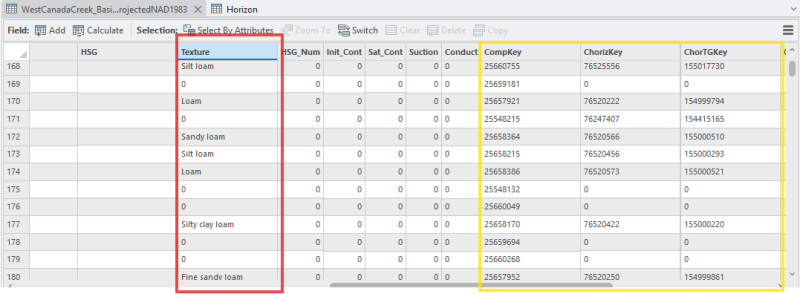
Note: Some cells have a value of 0. This occurs because certain polygons have null values for the texture field — in other words, no texture information is available for those units.
This is where the information in the Name field becomes important. By reading the content of that field, you can determine the type of soil.
Aggiungi commento
Commenti